Vamos ahora a utilizar una shield para Arduino Uno que es una placa multifunción diseñada para hacer experimentos (HCARDU0085). Se puede encontrar como LENARDO en Aliexpress o como HACKATRONICS. Incluye diferentes componentes para llevar a cabo una serie de prácticas sin tener que realizar cableado. Es ideal para los que están empezando para obtener resultados al momento.
IMPORTANTE: Antes de conectar la shield LENARDO encima de Arduino, comprueba que ninguno de los pines toque alguna parte metálica de la placa Arduino, especialmente en la chapa del conector USB. Recorta los pines y/o añade un poco de aislante encima del conector USB.
Debes recordar que estás usando la conexión USB con el ordenador. Aunque funciona a sólo 5V, evita producir cortocircuitos o sobrecargas. Siguiendo las prácticas no deberías tener ningún problema.
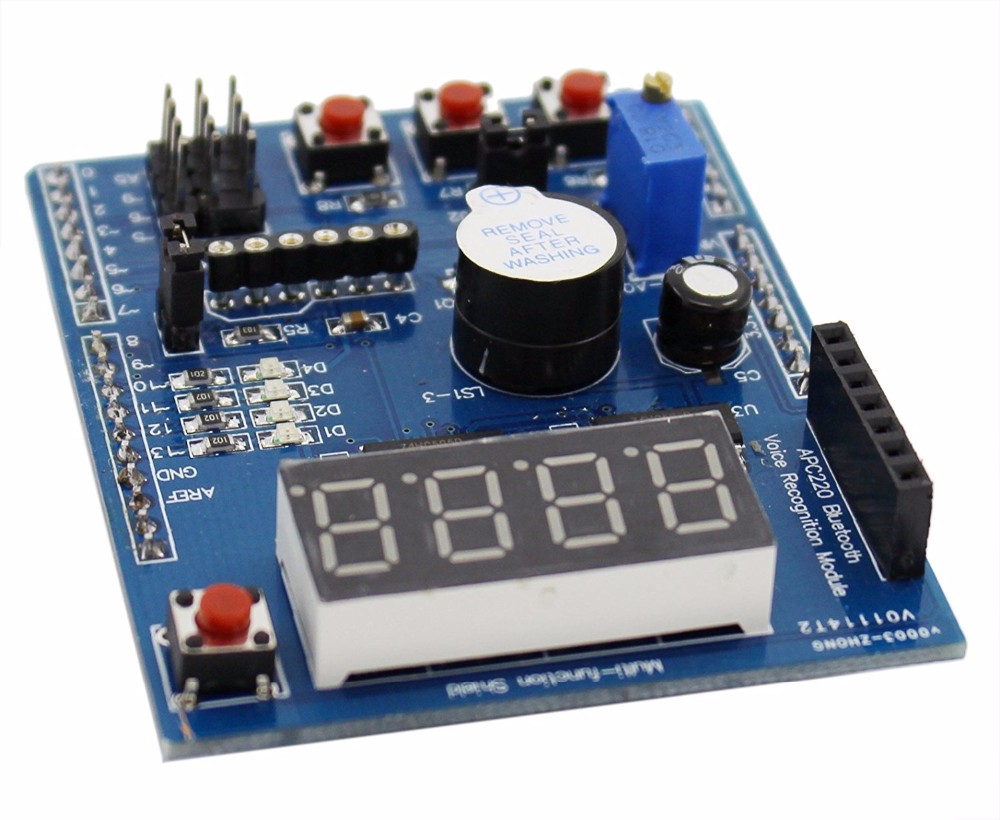
Características de la shield multifunción LENARDO:
- 4 digit 7-segment LED display module driven by two serial 74HC595's
- 4 x surface mount LED's in a parallel configuration
- 10K adjustable precision potentiometer
- 3 x Independent push buttons
- Piezo buzzer
- DS18B20 temperature sensor interface
- LM35 temperature sensor interface
- Infrared receiver interface
- Serial interface header for convenient connection to serial modules such as Bluetooth, wireless interface, voice module, a voice recognition module etc
FAQ:
a) When trying the seven segment display example, one or more segments are permanently illuminated.
IMPORTANTE: Antes de conectar la shield LENARDO encima de Arduino, comprueba que ninguno de los pines toque alguna parte metálica de la placa Arduino, especialmente en la chapa del conector USB. Recorta los pines y/o añade un poco de aislante encima del conector USB.
b) LED D1 glows very dimly when the digital pin connected to it is configured as in input but the other LED's are all off.
If you have an old Arduino board this may have an LED labled 'L' permanently connected (via a resistor) to the same pin that controls LED D1 on the shield (digital pin 13). This is providing a current path via these two LED's which causes both LED's to always be forward biased and turned on. In newer revisions of Arduino boards the design was changed to resolve issues caused by this LED being connected to digital pin 13 .
c) Instalando librerías Arduino de la multi-function shield
Para que funcionen correctamente los programas de ejemplo de la zona DESCARGAS, se debe instalar s librerías adecuadas en Arduino. Si no está hecho todavía averigua cómo se instalan las librerías.
1.- Primero instala las librerías TimerOne and Software I2C usando estas instrucciones instructions for installing Arduino libraries.
2.- A continuación descarga la librería multi-function desde el link a continuación e instálala siguiendo las instrucciones del lik anterior:
- Multi-function shield library (download older version 1.1 or version 1.0 if necessary)
- All source code used in series
Si por alguna razón no has conseguido instalar con éxito estas librerías, entondes descarga este archivo library bundle en su lugar, descomprímelo y cópialo en la carpeta Documentos\Arduino\libraries (si usas Windows) o equivalente en otro S.O.
Programas. DESCARGAS
Hay tres categorías de ejemplos (también se puede encontrar todo en un único archivo eBook (zip - 21831 B)
Part 1 demonstrates the ease with which the multi-function shield buttons, beeper and display can utilized by using the shield library, thereby making it easier to concentrate on the logic of the application. Part 2 demonstrates how the shield library can be used to read values from external sensors, such as temperature, sonar and motion sensors, and how to process electronic pulses from an external source. Part 3 explores working applications using the library and the multi-function shield:
- 24 hour alarm clock
- Heart monitor – (requires heart pulse sensor)
- Count down timer
- Surface incline level indicator– (requires MPU6050 motion sensor)
- Sonar ranger – (requires HC SR04 sonar module)
- Speedometer – (requires magnet and reed switch)
Conociendo la biblioteca MultiFuncShield
Estas órdenes conviene tenerlas como referencia cuando utilizamos los programas para la shield LENARDO
#define ON 1 // En lugar de utilizar HIGH / LOW, para utilizar ON / OFF
#define OFF 0
#define LED_1_PIN 13 // El LED 1 de la shield Lenardo está conectado al pin 13 de Arduino
#define LED_2_PIN 12
#define LED_3_PIN 11
#define LED_4_PIN 10
#define POT_PIN 0
#define BEEPER_PIN 3 // El zumbador de Lenardo está conectado al pin 3 de Arduino
#define BUTTON_1_PIN A1
#define BUTTON_2_PIN A2
#define BUTTON_3_PIN A3
#define LATCH_PIN 4
#define CLK_PIN 7
#define DATA_PIN 8
#define LM35_PIN A4
#define DIGIT_1 1
#define DIGIT_2 2
#define DIGIT_3 4
#define DIGIT_4 8
#define DIGIT_ALL 15
#define LED_1 1
#define LED_2 2
#define LED_3 4
#define LED_4 8
#define LED_ALL 15